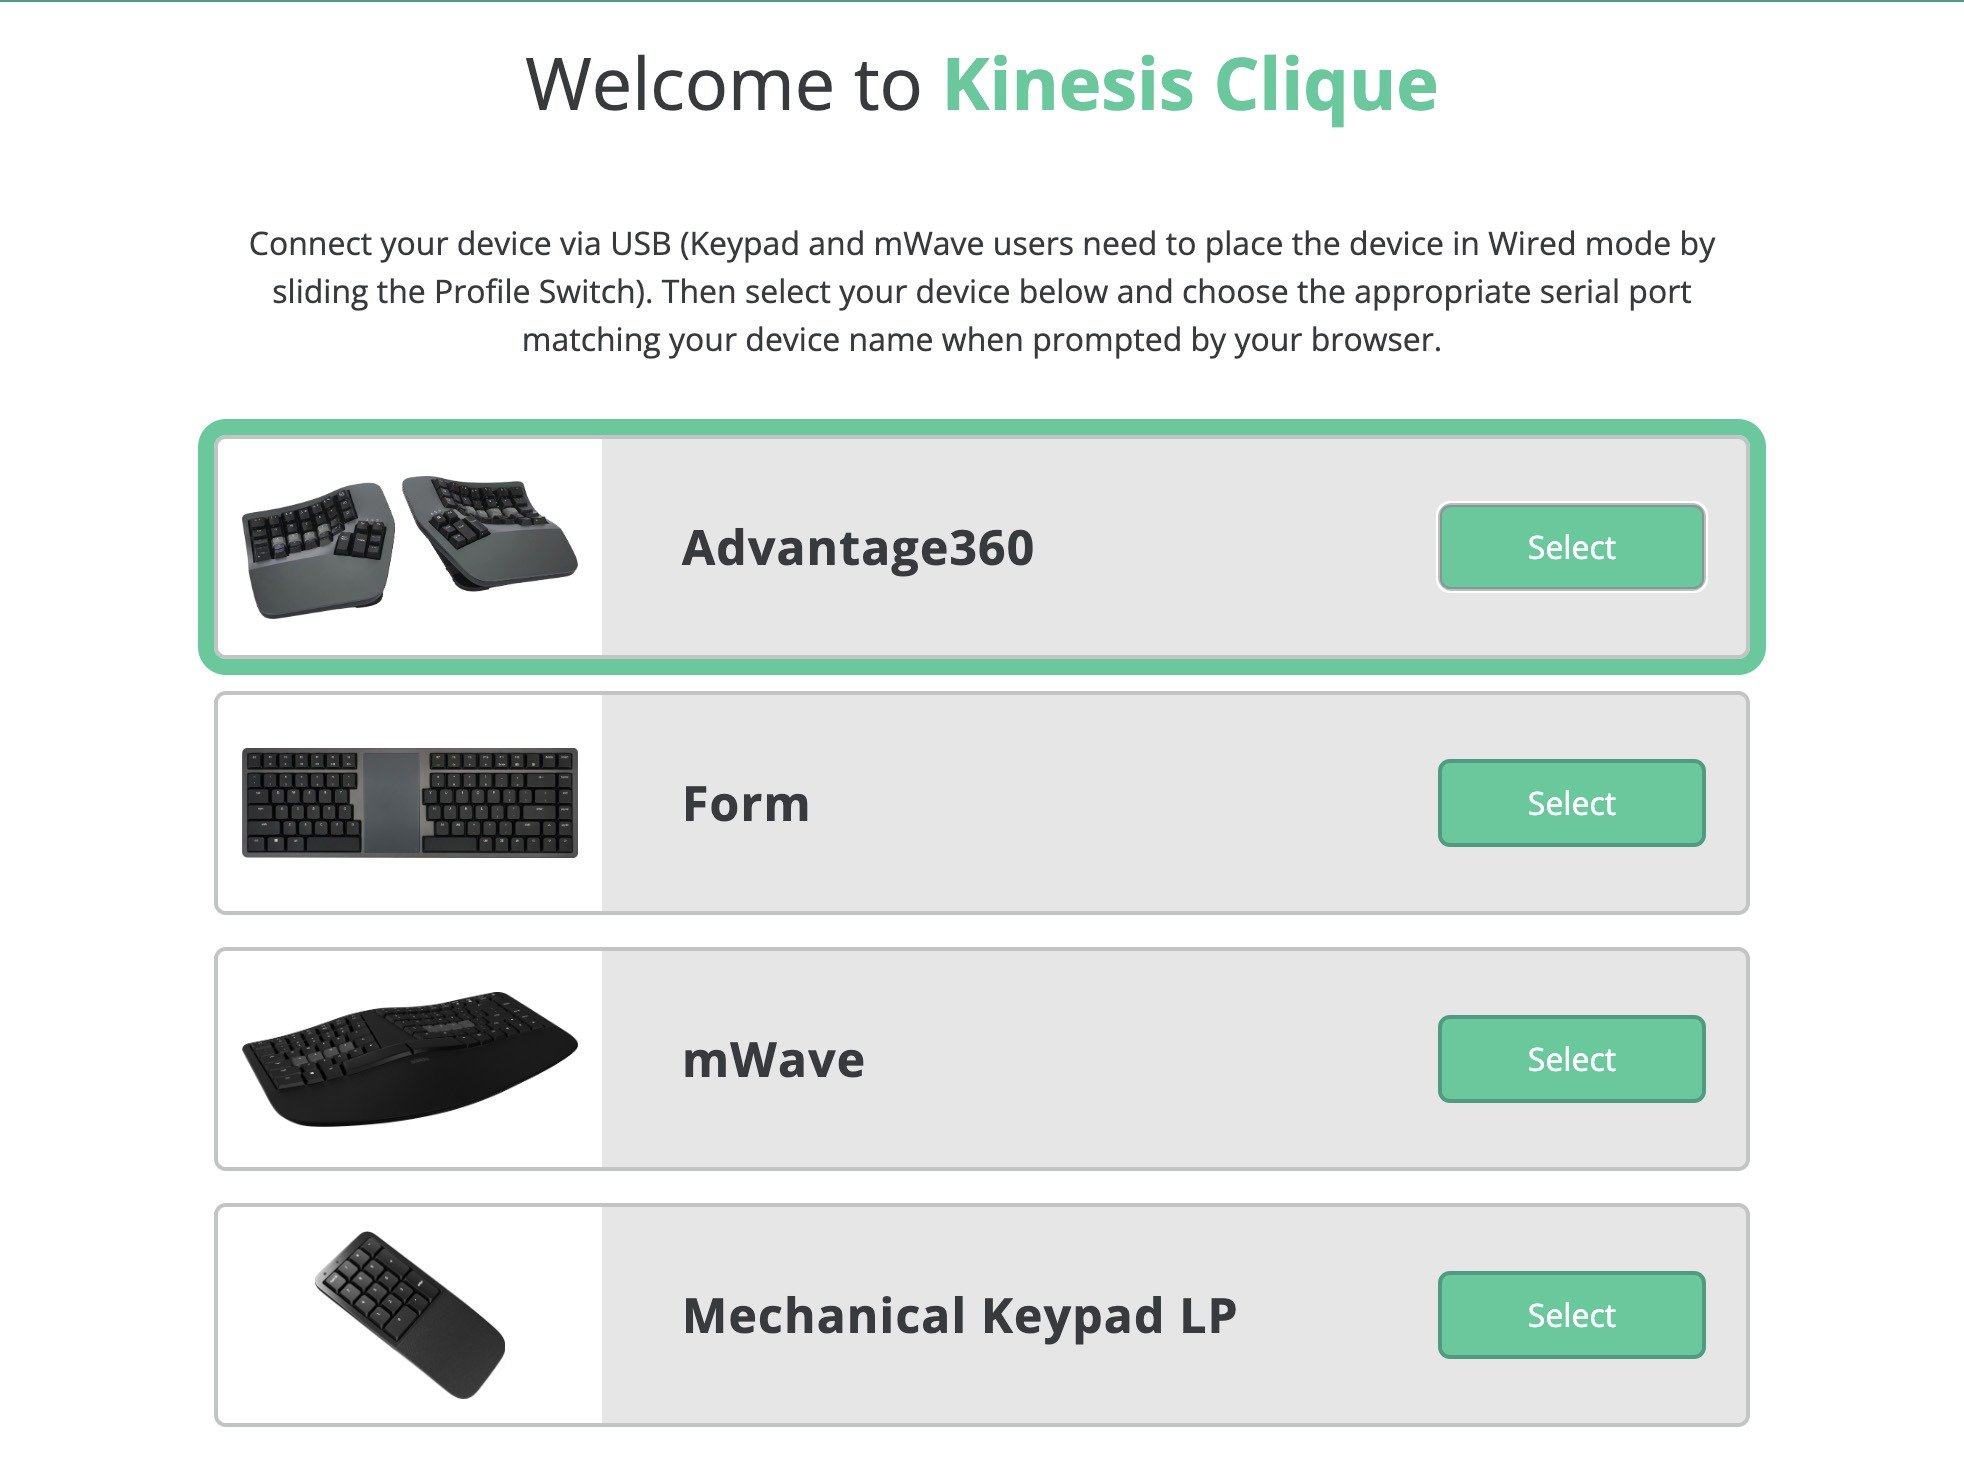
Getting Started with Clique

Step 1
Confirm your Kinesis device supports Clique. Only ZMK-powered devices such as FORM, mWave, Advantage360 Professional and Mechanical Keypad LP support Clique.
All other programmable Kinesis keyboards use the SmartSet Engine.
Step 2
Connect your keyboard to a desktop PC using the included USB cable. mWave and Mechanical Keypad LP users will also need to use the Profile switch to toggle to Wired Mode (Green LED).
Clique does not support wireless programming.

Step 3
Launch Clique using a Chrome, Edge or Brave desktop browser. The web serial ports Clique uses to connect to the keyboard are NOT supported in Firefox, Safari and other browsers.
Clique is not intended for programming via a smart phone.

Step 4
Select your device from the home screen and then choose the corresponding “serial port” when prompted by your browser. If you don’t see your device on the port list you may need to update your firmware.
Ignore any “generic” ports on your PC.

Step 5
For security purposes you must use a key command to unlock the keyboard. Clique will display the default unlock command for your device.
If you get locked out you will need to flash the “Reset File” the keyboard to restore the default Unlock Command.
Navigating the Action Menu
Clique supports a virtually comprehensive library of USB commands under the Basic Action menu.
- Browse: Use the tabs to browse the various actions for inspiration. The green dot indicates the location of the current action.
- Search: Use the search bar to find exactly what you are looking for. Tip: If you are searching for a symbol, use the name of the symbol rather than the symbol itself.
- Filter: Most of these USB actions are Linux-only, so Mac and Windows users will want to check the appropriate filter to display only actions supported on your O/S. Tip: Checking multiple filters displays actions that work on BOTH operating systems, not EITHER .
Clique also supports a variety of Special Actions and behaviors that go well beyond what other keyboards can do.
Tip: ZMK Power Users can learn more here: zmk.dev/docs/features/studio
Layer Navigation
Every Kinesis keyboard has at least 2 layers. Layer navigation keys like “Fn” or “Kp” are included by default but you can customize both the location and behavior of these keys with Clique. If you start add new layers make sure you give yourself access TO and FROM each layer or you will get stuck.
Tip: The Transparent action (Advanced Action>Misc) can be a useful tool to create reciprocity between layers.
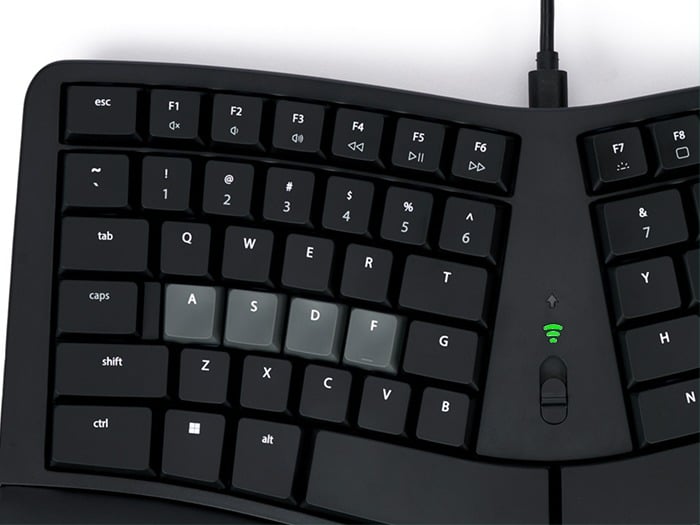
Lighting
All Clique-compatible devices feature available white backlighting. Depending on your device you may have one or more backlight commands on your device by default, but with Clique you can change the location and behavior of those commands to suit your preferences.
Tip: The Advantage360 also has a command to toggle on and off the 6 indicator LEDs.
Macro Library
A macro is a key combination or sequence (aka string) that is triggered by a single key press. Clique has basic library of pre-programmed macros configured for both Windows and Mac. And later this year we will add support to build and edit your own custom “string” macros.
Tip: You can build your own “combo” macros by assigning any number of left and right modifiers to any Basic Action using the “Add Modifier” sidebar.
Mouse Actions
One easy way to improve ergonomics is to reduce the number of times you reach for the mouse by adding mouse clicks to your keyboard. Clique offers all 5 mouse clicks (Left, Middle, Right, plus Button 4 and 5). Mouse Movements and scrolling will be added in the future.
Tip: The mouse Double-Click action can be found in the Macro>Other section.
Advanced Actions
Advanced actions are intended strictly for ZMK power users who know exactly what they are doing. Not all Advanced action are support on all Kinesis devices. Read the ZMK behavior documentation linked above and PROCEED WITH CAUTION or you could cause your keyboard to lock up.
Tip: If you assign an unintended action, you can use the Undo button go back.
Basic Workflow
- Use the zoom tool to scale the Keymap to your monitor & preferences.
- Use the tabs at the top of the screen to navigate the default layers or add a new layer.
- Use the Keymap to select the key you wish to reprogram.
- Use the “Action Menu” to browse or search for the desired action.
- Once you have chosen your action, test it to ensure it works as intended.
- Click the “Apply” button to store your change or “Cancel” to select a different key to program.
- Changes are temporary unless you click “Save” to permanently store them on your keyboard.
Looking for some inspiration? Try these ideas.
Make your non-dominant space bar Backspace or Delete
- Select the desired space bar in the keymap
- Select Basic Actions
- Select Backspace or Delete from the Navigation sub menu
- Click Apply
Enter and backspace from your thumbs!
Improve keypad access with a Tap and Hold Press effect
- Select the desired (non-modifier) key on the left side of the keyboard in the keymap
- Select the Press Effect drop down and choose “Tap and Hold”
- Select the Layer Navigation tap at left and choose Momentary Layer
- Select the layer that includes the default keypad and click Apply
Tap the key for its original function and hold it to change layers!
Eliminate uncomfortable key combos with a Sticky Shift
- Select one of standard shift keys in the keymap
- Select the Press Effect drop down
- Choose the “Sticky” option and click Apply
- Repeat the process for the other shift key
Tap shift and it will stay shifted for one second so you don’t have to hold it!
Disable any key that you might be hitting accidentally
- Select the desired key in the keymap
- Navigate to the “Selected Key” display at the right of the keymap
- Click the “Clear Key” button (scroll down if necessary)
- Repeate in the other layers if desired
Now that key will not send any action to your computer!
Locked Out?
If you accidentally programmed over the Unlock command you will need to flash the appropriate Settings Reset and Firmware files for your keyboard. Visit the link below for files and instructions for your device.
Advantage360 Pro | mWave for Mac | mWave for PC | Mechanical Keypad LP | FORM
Quick Configurations
- QWERTY, Dvorak, Colemak Layouts
- Mac or Windows Hotkeys or Modifiers
- Function Row F1-F12
- Or create a new duplicate layer with “All Transparent”
Exact features depend on your keyboard model

Support for up to 8 Layers
- Click the + button to create a new layer in the stack
- Click the – button to delete the currently selected layer (Note: Default layers cannot be deleted)
- Click the Erase button to clear the currently selected layer
- Click the Copy button to create duplicate of the currently selected layer
- New Layers are named according to the Layer LED color
Navigating Layers
If you create new layers, you will need to assign one or more Layer Navigation actions both TO and FROM your new layer. You can navigate directly to/from the Base Layer or you can treat each layer as if they are part of a stack and drill up or down. Note: The keyboard will always default to the Base layer on startup
Troubleshooting Tips
- Have you connected your keyboard to the PC via USB and placed mWave/Keypad into Wired Mode?
- Are you using a Chrome, Edge, or Brave Browser?
- If you are having trouble accessing Clique try is refreshing your browser.
- If you are still having trouble connecting to Clique, replug the keyboard to reset the serial port connection.
- If you don't see your Kinesis serial port, you may need to update your firmware.
- You can only edit one key at a time. So hit "Apply Change" or "Cancel" and then select a new key.
- Plan to modify a bunch of keys? Open the Settings menu and enable Rapid Edit mode to bypass the "Apply" step.
- You can use the Clear Key to wipe one key or the Layer Erase button to start from scratch.
- Made a mistake? Click the keyboard name at the top of the screen and choose Restore Default Keymap.
- If you modify the default Unlock command and get locked out, you will need to re-flash firmware (see Locked Out? above)
- Customizing ZMK behaviors (like macros, HomeRow Mods) is not currently supported in Clique.
- Some Linux machines may require that you enable the serial port connections to use Clique, or add your user to the UUCP group.
- Make sure to hit the Save button or your changes will only last until you unplug the keyboard.
- mWave not working after Clique? Make sure you tap the Fn key again to toggle back to the Base Layer.
- "Screen Size Too Small": Try zooming out in your browser via Windows/Command and minus.
CLIQUE IS POWERED BY ZMK STUDIO
Can’t use Chrome or Edge, or simply prefer to build offline? You can use the link below to download the latest version of the “ZMK Studio” native app for Linux, macOS, or Windows. Note: ZMK Studio has a totally different workflow and feature set and is not officially supported by Kinesis.
ZMK Studio © 2025 – The ZMK Contributors